Student Schedule Builder
The Student Schedule Builder is a web-based schedule planner that presents students with all possible schedule options that are currently available for registration. With this tool, you can easily generate a class schedule that fits your individual needs without having to resort to pen and paper.
Video Tutorial: How to Use the Schedule Builder
How to Use Schedule Builder
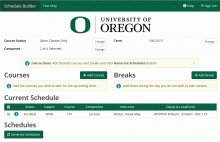
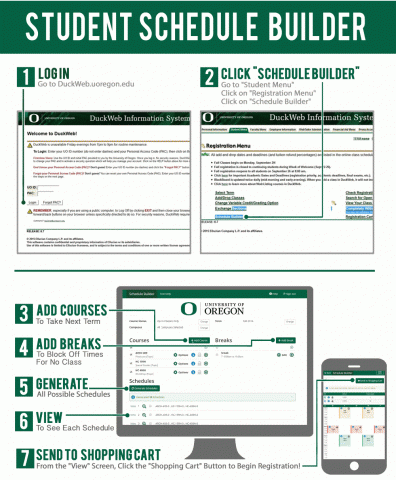
Begin by logging into DuckWeb. Go to Student Menu > Registration Menu > Schedule Builder. Follow the prompts on this page to build your schedule.
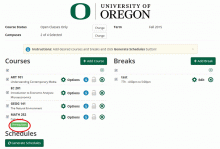
To add courses, select a subject and course and click Add Course. Repeat this step to add each course to your schedule.
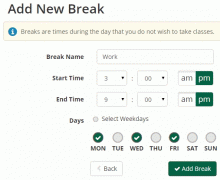
Use the Add Break button to block off times in your schedule. (These are times in which you do not want classes to be scheduled.)
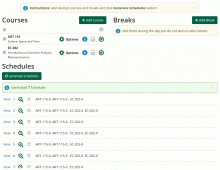
Use the Generate Schedules button to view all possible schedules based on your criteria, and click View to display a detailed schedule.
When you are finished, click on the Shopping Cart button to send your schedule to a shopping cart, to begin registration.
Getting Started
To begin, log into DuckWeb and go to Student Menu > Registration Menu > Schedule Builder. Wait a few seconds for the page to redirect.
After you are redirected, you will be prompted to select a term and campus (typically, "UO Main Campus"). Click Save and Continue.
Add Courses
Clicking the Add Course button will take you to the Add Courses page, where you can search for courses by "Subject" or by "Gen Ed/Languages". Use the drop-downs to select a course and click the Add Course button to add it to your desired course list. You can also enter text into the Subject and Course drop-downs to search for the courses you are looking for.
Repeat this process using the Add Course button until you finish adding courses. Next, return to the front page by clicking the Schedule Builder Back button (not your browser Back button). (Note: You are not yet registered for these courses.)
Add Breaks
Breaks allow you to block out times period where you do not want classes to be scheduled. Be careful not to schedule too much break time, or you may get fewer schedule results.
To add a break, click the Add Break button and choose a block of time for your Break. Click the Add Break button again to add it to your schedule.
Generate Schedule
After you have added courses and breaks, click the Generate Schedules button view your possible schedules.
If no schedules appear, a message will identify the time conflicts. Uncheck the least desired conflicting course. Alternately, you may delete the conflicting course and select an alternate course using the Add Course button.
View Schedule
You can preview a possible schedule by hovering your mouse over the preview icon (![]() ) or compare up to four schedules by checking the boxes in the list and clicking the Compare button.
) or compare up to four schedules by checking the boxes in the list and clicking the Compare button.
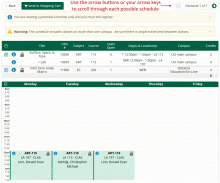
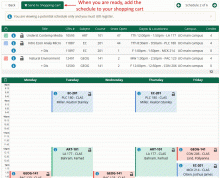
Click on the "View" link to view a full-page schedule. Use the arrow buttons at the top of the page or the arrow keys on your keyboard to navigate through each possible schedule from the generated list.
When you have chosen a schedule, click the Send to Shopping Cart button.
Registration Cart
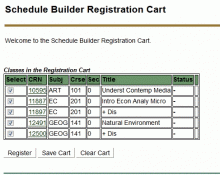
The Send to Shopping Cart button will take you to your Registration Cart. When you are ready, click the Register button to complete your registration. This will send the contents of your cart into DuckWeb and register you for those courses.
After you click the Register button, check your results carefully to make sure you are completely registered. Note that Duckweb now enforces prerequisites, instructor approval requirements and other restrictions.
Helpful Tips and Tricks
Topics Courses
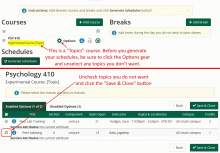
If you see "[Topic]" in a course title, it is a "Topics Course" (a set of courses that deal with different aspects of a broad subject). When you add a Topics Course to your schedule, Schedule Builder will return all topics. Use the Options button to un-select any topics you don't want before you click the Generate Schedules button.
Options Button
The "Options" button (![]() ) has other uses. If there are multiple sections of the same course, you can narrow down the selection before generating schedules. Unchecking boxes allows you to favor certain instructors, classrooms, etc.
) has other uses. If there are multiple sections of the same course, you can narrow down the selection before generating schedules. Unchecking boxes allows you to favor certain instructors, classrooms, etc.
Prerequisites
Schedule Builder will show course prerequisites, if applicable, but these are not enforced until you save your Registration Cart and click the Register button.
Freshman Seminar Courses
FSEM 199 (Freshman Seminar) classes are not listed under the "FSEM" subject code. They appear under their individual subject codes (ANTH, BA, etc). Contact First Year Programs for a listing of FSEM courses.
Restricted/Reserved Sections
Schedule Builder displays any sections with open seats, including any that might be reserved or require department approval. This may prevent you from adding these sections when you click the Register button in the Registration Cart. If this happens, you may return to Schedule Builder to select other courses. You may also check the Class Schedule, or "Search for Open Classes" in Duckweb to view footnotes and other indicators for sections that are restricted or have reserved seats.
Lock Icon
The "lock" icon (![]() ) in Schedule Builder allows you to "lock in" a specific course on your schedule. Then you can view different schedule options for other courses, with the one course locked down.
) in Schedule Builder allows you to "lock in" a specific course on your schedule. Then you can view different schedule options for other courses, with the one course locked down.
Sign Out Button
The Sign Out button at the top right corner of Schedule Builder (![]() ) returns you to the DuckWeb menu. It does not log you out of DuckWeb.
) returns you to the DuckWeb menu. It does not log you out of DuckWeb.
